
“If we truly want to prepare our students for the real world, we need to put them in responsive, dynamic environments that reflect life outside of a traditional classroom. And what’s that life outside like? Full of choices, where adults are responsible for their own learning. As a college student visiting my classroom once said, “It’s like you’re treating them like little adults.” And as my teaching has changed, my classroom design needed to change right along with it.”
– Kayla Delzer, Why Flexible Seating?
There are many reasons you might want to start using flexible seating in your room. They could range from giving your students more choice to letting your students move more throughout the day. You may have read the research and decided it’s something you were ready to try. Now that you’ve made that decision, you are probably starting to feel the stress and overwhelmedness (yes it’s so bad that I created a word for it) that comes with changing your classroom and really your entire teaching style.
Sound familiar? All of these questions swirling in your head are perfectly normal. Changing your entire room is a big deal. In this post I want to try and help you start on your flexible seating journey. I will walk you through the steps you need to take to be successful in using alternative seating options in your classroom.
Let’s dive in.
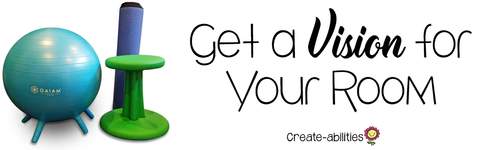
After you have decided you are ready to try flexible seating, the first thing you need to do it make a plan. Look at your space. Look closely at your teaching style. What areas of your room do you use the most? What areas do you use the least? What areas are hard to walk around or through? Where do you prefer teaching your kids during whole group instruction? Where do you prefer to teach them during small group instruction? Starting to really look at how you use your room will help you start making choices in what to change.
Next you need to decide what to keep, what to move, or what to change. I had a hybrid in my room with each student having a traditional desk as well as having flexible seating options. I did this for two reasons. The first being that alternative seating can be expensive and overwhelming. The second is that I wasn’t sure if I was completely ready to get rid of my desks. The hybrid option worked well for me, however I would have loved to add in more of the options I will discuss below.
You need to decide how you want your room to look. Do you want your students standing or sitting during guided reading? Do you want them to stand only when do independent work? Do you prefer them using alternative seating options during only certain times of the day? Do you want to remove your desks completely or just add in a few more options?
Each room is unique. The space you have will vary greatly from teacher to teacher. But I challenge you to look at your room and decide what your vision will look like. Remember, this doesn’t have to be a huge change. If you aren’t ready to toss out all your desks, start small. Add in a few bean bag chairs or cushions for the students to work on during independent time. Change a few desks to standing desks or lower one of your tables to kids can sit or kneel next to it. If something you try doesn’t work, CHANGE IT! You are not locked into anything and you can keep making small tweaks until it works for you.
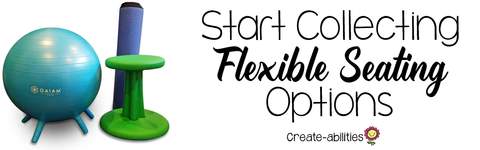
Now that you have created a vision for what you’d like your room to look like, it’s time to start collecting different options for your students to use. There are SO many different things you can use in your room. The best part about flexible seating is that you can be creative! Things that I have tried or that I have seen work in classrooms are (affiliate links):
Don’t let this list overwhelm you. Some of the items on this list are very expensive and some are very cheap. Still, creating the flex space you want can really add up. There are several things you can try to solve this problem.
1. Donors Choose: This is a great website where you can post a project you need funded for your classroom and donors from around the world can help fund it.
2. Garage Sales: Take some time on Saturday mornings to hunt for some fun and unique options at garage or estate sales. You can find some really interested options that you won’t find anywhere else.
3. Goodwill or the Salvation Army: Check thrift stores for different options. Make sure it’s something that can be wiped down or cleaned.
4. Parent Donations: If you live in an area where parents can help with things like this, a simple note home might be a great way to get some of what you need.
5. Grants: Local district grants or larger country-wide grants can be a nice way to fun your room.
6. Company Donations: I went to my local Walmart with a note for the store manager asking for a donation. They gave me $25 in free product. That isn’t a ton of money but every little bit helps.

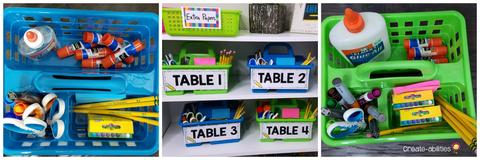
After getting the flexible seating choices for your room, you need to decide how your students will access their supplies. Since my students still had their own desk, this was never a problem for me. However, if you decide to get rid of all of your desks, you will want to find a place where students can easily access what they need. This also tends to be a big parent concern and they will feel better once they know where their child can get supplies.
You can:

It’s now time to introduce the options to your students. The kids will be very excited when you first introduce the different options to them. The key element here is to explain everything very explicitly and then MODEL, MODEL, MODEL! The more model and guidance your students have, the smoother things will go. Also know that with certain groups of kids, the first week or so using an entirely flexible system can be rough. That’s normal. Stay consistent, stay firm, and keep trying.
I also like the idea of creating an anchor chart with your students to go over the rules and expectations. It’s a good idea to say something to them like, “You may sit anywhere you like as long as you’re safe, responsible, and respectful.” Then you can go over the rules.

The more explicit you can be with your students the better. One rule that you might want to add is “Mr./Mrs. _______ can move anyone at any time.” This means that you as the teacher have discretion to move students who can’t manage themselves. This is a useful rule if you have students who always sit by their friends and want to talk or students who misbehave in certain areas of the room. Your kids will know upfront: no warning, no reminders.
This is also a good time to encourage your students to try all of the different types of seating options available. One of the benefits of flexible seating is helping our students become meta-cognitive of their learning process and what works best for them. Occasionally ask them why they chose a certain spot to help get them thinking about how they learn best. This will be an important life skill that they will use for years to come.
Another important tip is to have more seating choices available than students. Not only does this cut down on arguing or fighting, it also give those kids who learn best in a certain type of seating choice, more options and chances to get that choice. Spots in my room were first-come-first-serve. You also could not save spots for friends. I really found that once my students got used to the different seating options, there was not a lot of fighting and arguing because they would rotate (really without even noticing) throughout the week without me getting involved.
You can have them sign a contract after going over the rules and procedures so they feel more invested in the entire process. You can download my FREE EDITABLE Student Contract here. You will need to download the font KG Miss Kindergarten to use to the same font I did in the text.

Some parents might have a hard time understanding the switch to non-traditional seating. They might worry about access to supplies, the comfort of their child, or because it’s something unfamiliar. Send a note home explaining how your classroom works. Include pictures if you can. If you still have parents that are concerned, invite them in to view your classroom. Once they see how things work, they will definitely feel better and will probably become a proponent of flexible seating in the classroom.
You can download my FREE EDITABLE Note to Parents here.
This is by far the biggest concern among teachers that I have seen when planning for flexible seating in classrooms. Because I had a hybrid version I could change the routine depending on the substitute I had. If I knew them and knew they could handle it, I would briefly explain how the choices worked and things ran normally in my room. If I didn’t know the sub (or I had a class that I didn’t trust to follow the procedures in my absence) I would include in the sub plans to keep everyone in their normal seats. If you have gotten rid of your desks completely, make sure to outline your routines and procedures in as much detail as you can. Write down the expectations for each seating choice, what students are allowed and not allowed to do, and what the substitute can do if the flexible seating choices become chaotic or noisy. If possible, place your rules anchor chart in front of the room so your students know that you have told the sub the rules and they need to remember to follow them. The more you have modeled and practiced with your students before your absence, the smoother things will run. But remember, even if you have to be gone and things get crazy, it’s only 1-2 days at a time. You will be able to come back and get them back into a routine.
Remember that this is a shift in your classroom set-up AND your teaching style. You will essentially be handing over the power of the seating chart to your students. You will have to constantly be aware of your students engagement levels around the room in ways that you might not be used to. You might have to remove furniture that has been considered an important part of a traditional classroom for many years. All of these small shifts can add up to be the big changes you want to see in your room. It might be challenging at times, but I promise that if you keep making small tweaks, you will get the classroom you’ve always wanted.
You can watch a video I did on Facebook live where I talk about all of these things (and more!). Enjoy!